Posted on

DIY 26 Speaker Ambisonic Dome – Part 3

Software

Back in the 70’s you could buy hardware Ambsonic decoders, such as the Integrex. They were niche, and usually available as a kit you built yourself. Reportedly, they did not perform very well though I’d love the opportunity to hear one to judge for myself. The largest drawback of a hardware solution is that you are tied down to one configuration of speakers. Personal computers have become so inexpensive and powerful that it is easier and far more flexible to drive the dome from a software solution.

The ideal software for cost effectiveness is Pure Data, also known as PD. It’s hard to beat free software for price. This is an open-source solution and comes with all of the benefits and drawbacks of an open product. There is a lot of support and a real community around PD, but if it breaks, you get to keep both pieces and there may be no-one interested enough to help you. This is also a good way to describe the current state of Ambisonics in PD, specifically the HOA toolset.

HOA tools from the PD patch repository.

It looks great – it also doesn’t work anymore with the current version of PD and hasn’t worked for years. You could try running it in a version of PD from when it was released, but then you will discover that other parts of PD will not work because they are too old. To borrow a phrase from the Linux community, you are now in ‘dependency hell’ where there is no combination of software versions that will work for everything you want to do.

I’ve run into this problem a lot when developing for Arduino, where it is particularly bad. I often wonder if anyone in the Arduino community actually gets any real-world work done with the products they write about on their webpages. A popular library for processing the output of gyroscopes has an axis completely reversed for some hardware. None of the popular Youtube channels or blogs even noticed and the main library remains unfixed.

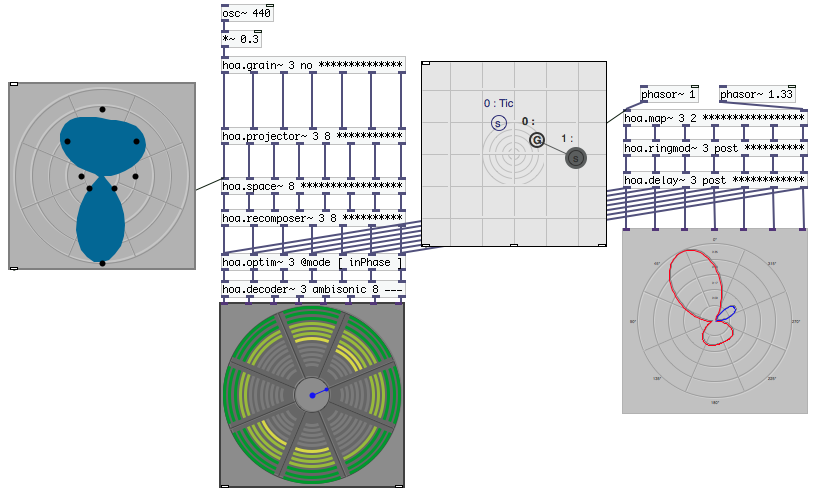
With PD reluctantly excluded, we must turn to MAX/MSP and MAX for Live. The HOA tools from PD are also available in MAX, but why make life difficult when the excellent ICST Ambisonics package is available for free in the package manager.

ICST Ambisonics in MAX/MSP

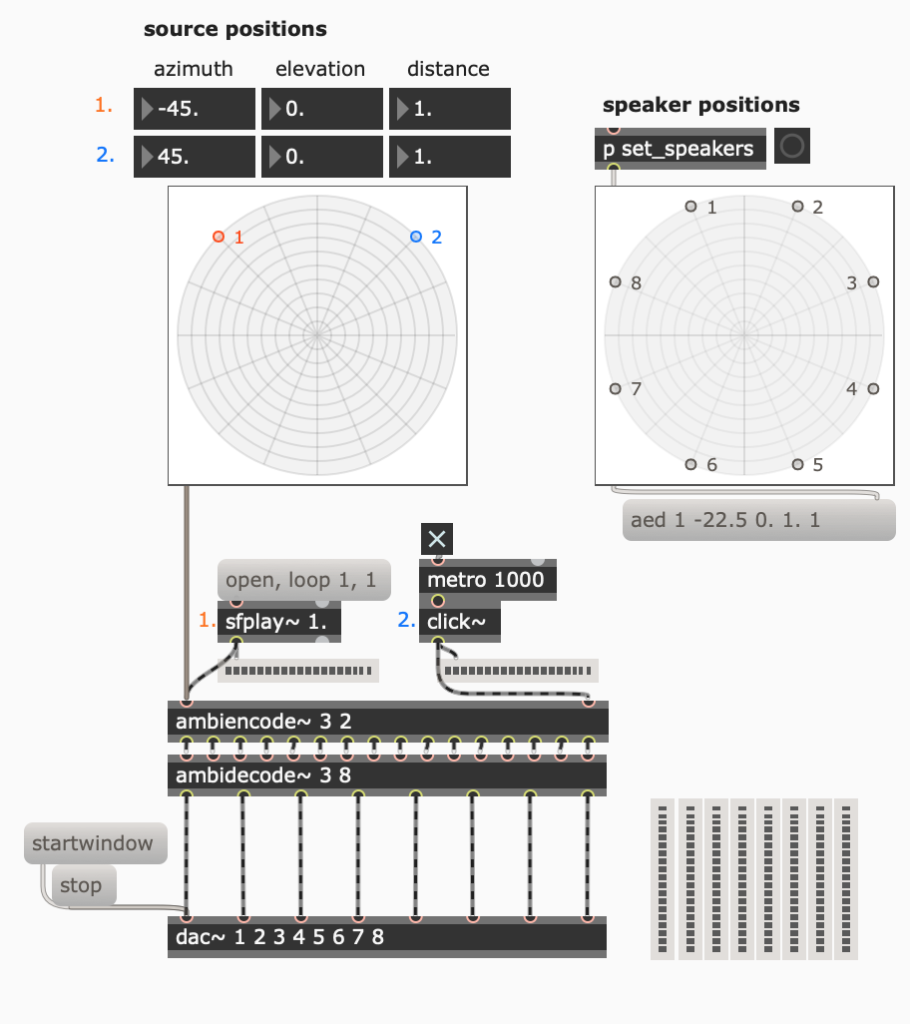
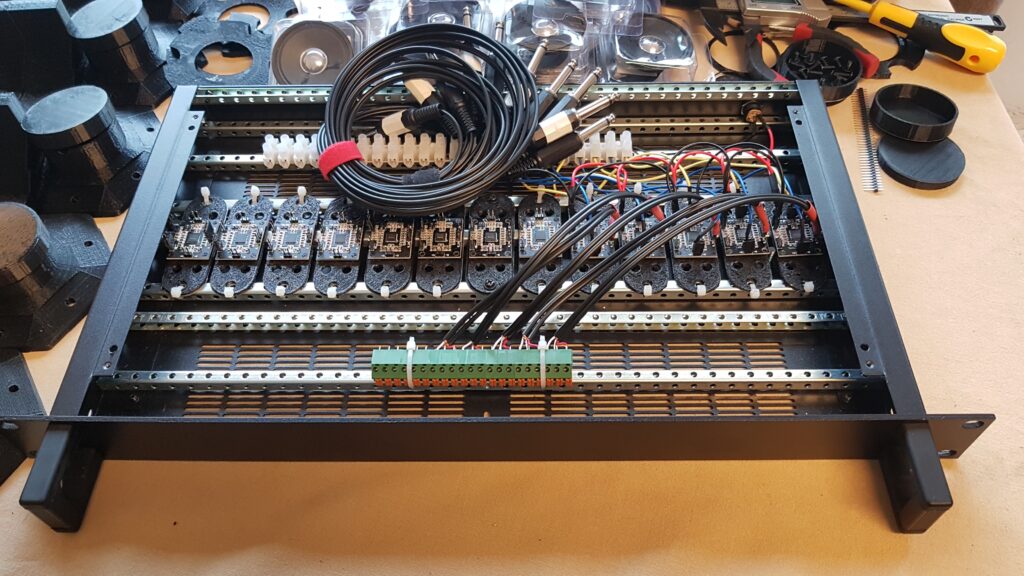
ICST Ambisonics makes a complex job easy. If you know where your speakers are and you know where your sources should be (or you have audio already recorded in a surround format), you can have audio coming out of the array in just a few minutes. My own software stores lists of speaker configurations to suit different rooms. You can select 4, 5, 10, 20, or 25 channels (plus the subs channel).

A simple decoder for playing prerecorded sound through the dome. The speaker array selector buttons are on the right.
My own MAX patch for an Ambisonic mixer/instrument and DMX lighting controller
This one is an interface for an Ambisonic computerised version of Laurie Anderson’s tape bow.
The Ambisonic decoder plugs right into the outputs from your computer. Two FireWire Focusrite Liquid 56s are twin-linked together to create this output set. It all fits within the bandwidth of one single FireWire 400 connection.

Unfortunately, MAX/MSP is not an open source product and it is not cheap. I still hope to replace MAX with PD when I have enough time to return to programming for fun, but that time may be never.

Waves NX

Although the dome is portable, transporting it requires several large boxes and about 6 hours of swearing to set it up (if you are on your own). There are some clever tools available to bring something approaching surround sound to your headphones.

Let’s first talk about mix room simulation.

Room simulation tools have been around for a long time. I used to use Focusrite’s VRM (Virtual Room Modelling) until an Apple OSX update made it inoperable. These tools were very polarizing when they were released, many engineers hated they way they sounded. One friend who disliked the effect flipped through the presets, turned it off and on a few times, complaining about how fake and smeared the sound was. If you have the desire to try one of these tools, this is exactly how not to audition one. By turning it off and on and jumping from one room model to another you are concentrating on the differences between the emulation and the reality – you are creating a condition where the emulation cannot win.

At first, I didn’t like the VRM much either, but I left the headphones on and set to work mixing. About fifteen minutes later there was a knock at the studio door and I leapt to the room controls to turn the monitors down. I had been fooled and completely forgot that I wasn’t listening to speakers. The same approach works with Waves NX – don’t dismiss this technology before giving it a fair listen.

Waves NX is step above a static room emulator. It is capable of tracking the movement of your head, either through your laptop’s camera or by using a special bluetooth sender that attaches to the band of your headphones. Some popular headphones have frequency compensation curves built into the plugin. Measure the circumference of you head and the distance between your ears around the back of your head (the inter-aural arc) and Waves NX will use a HRTF (head related transfer function) to calculate what each ear should be hearing as you move your head.

The Waves NX interface. Note the area for entering your head measurements in the lower left.

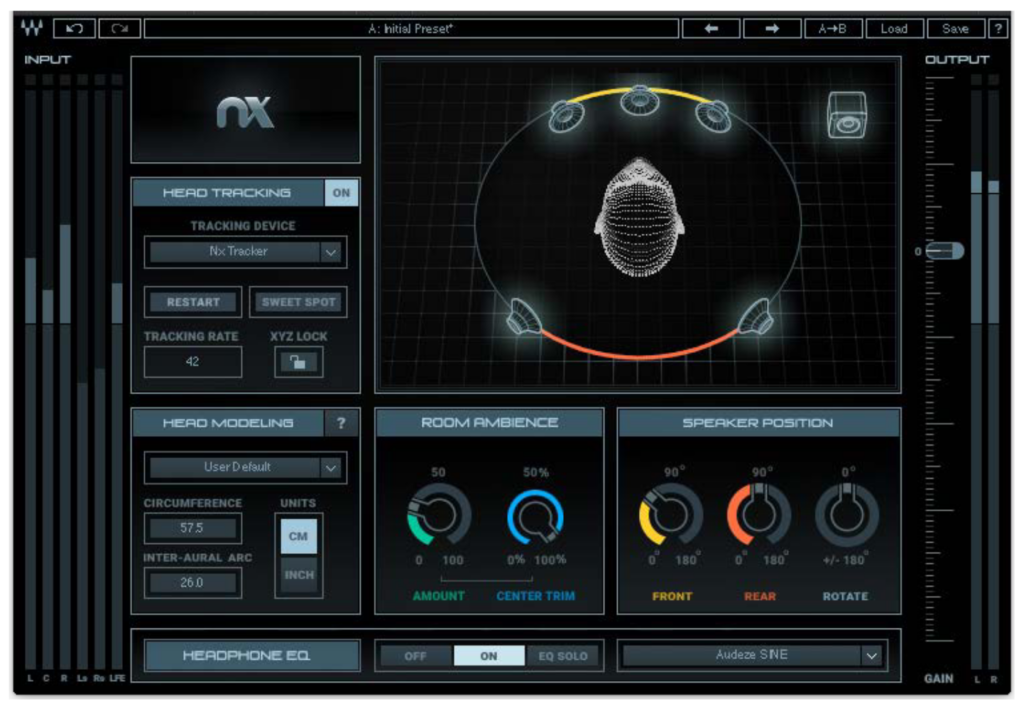
Waves NX is not kind to your processor if you use webcam tracking, and the positional lag as the camera system chases your face wrecks the effect a little (in a similar way to visual lag ruining your Virtual Reality immersion). It does work though, and a slew of competitors are releasing similar products.

DIY 26 Speaker Ambisonic Dome – Part 1, The Dome Structure

DIY 26 Speaker Ambisonic Dome – Part 2, The Audio

Posted on

DIY 26 Speaker Ambisonic Dome – Part 2

The audio

My vision for this project was to create an ambisonic dome for tinkerers and musicians who have a tiny budget but don’t mind putting in some DIY time. One of the biggest hurdles for keeping the dome design affordable was working out how the audio amplifiers and computer interfaces could be made or found cheaply.

Amplifiers can be very cheap when you need one or two channels – any Hi-Fi amplifier will do. If you want up to 6 channels you might be able to re-purpose an old surround-sound amplifier. You can’t get 26 channels of ready-made audio cheaply. Commercial power amps that handle over 16 channels are thousands of dollars. It was obvious that I would have to make something myself.

Digital amplifiers

I have been impressed by some of the small digital amplifiers available through Ali Express and Ebay. They can run from a huge range of voltages, deliver lots of power and are typically quite compact.

This is a Nobsound Mini Bluetooth Power Amplifier. You can find comparable models for ~$40-60. Audio performance is very good, but It is best to avoid the cheap Bluetooth implementation in these budget devices.

$20 per channel is still far too expensive for powering the dome – I’ll need 26 channels of audio. You can, if you look a bit harder, find digital power amplifiers sold in a very basic form, just a PCB and few support components. I found the PAM8610 stereo amplifier for $3.45

Digital amplifiers are very, very efficient and can operate without heatsinks for low power loads. The speakers in my dome are very small, but there are a lot of them. Sounds, even very directional ones, are represented in the dome by an array of speakers sharing the load, keeping the power demand on each speaker small. These little modules seemed perfect and my first test module seemed to perform OK. I ordered a whole pile of them and started on an enclosure.

The digital power amp. Each little module is two channels.

For each stereo module I 3D printed a mounting ‘sled’. The sled had push-fit fingers that held the modules in place, wire routing holes and mounting holes that could take an M3 bolt or a small cable-tie. It went together very quickly, looked neat and could be powered from a single 12V laptop power supply. It was also unusable.

I had noticed a small amount of noise during my individual module tests but I was entirely unprepared for the wall of noise that 26 channels of the PAM8610 would put out. It wasn’t only hiss – these units were interfering with each other, causing some very harsh noise components. I leveraged my years of experience fighting feedback squeal in valve amplifier designs and re-routed the grounds and power supply lines with a star-topology. A small improvement. I bypassed the power supply on each board with an MKT capacitor and added filtering at the power entry. Another small improvement but not enough. I had a week left before I had to exhibit the dome and I still did not have a working amplifier, so I needed to change course and try something different.

Old fashioned linear amplifiers are also available in chip form – though they can be annoying to work with at medium power, needing heatsinks or direct mounting on a metal case to keep them from destroying themselves through waste heat. I didn’t have time for all that, but I remembered that Jaycar stocked pre-made encapsulated amplifier modules. I bought every one they had and bulk ordered more than they probably would have sold in a year.

Not nearly as visually satisfying, but it did they job for the exhibition night. These amplifiers are now housed more neatly in a roomy 3U high case.

The amplifiers were sorted, but I still had to route sound to the dome from my computer. This is another area where a small number of channels is very inexpensive – stereo and even 5.1 surround sound is often built into motherboards or available on a cheap USB dongle. Finding 16 channels will probably cost you ~$2000, and 32 channels ~$4000. Although I would love to be able to justify buying an Orion 32+ from Antelope Audio, that would be overkill for this project. I also don’t have $4000 to spend for fun.

Whatever happened to FireWire?

FireWire equipment is available at bargain prices, if you are willing to take a risk on second-hand gear. FireWire used to be the only connectivity choice for professionals – unless you had some kind of solution that came with its own PCI card and bespoke connectors. USB was too unstable, too slow and had an air of “Intel PC” about it when everyone was using Apple to get creative work done. Then everything changed. Windows became stable (or stable enough depending on your luck and hardware) and Apple forgot that their professional users even existed, abandoning the Mac Pro and removing ports and functionality from their Pro laptops. It became nearly impossible to guess if your expensive interface would survive Apple’s next operating system upgrade. I have a graveyard of interfaces that no longer work with Apple computers – Focusrite, Digi, Edirol, Steinberg, Tascam, IK and others that I have forgotten about that now reside in dusty boxes in the shed.

There are a lot of FIreWire interfaces out there that are still compatible with current operating systems and doing good work but Firewire is obsolete technology and the prices really reflect that. You can buy large capacity systems cheaply but you have to be very careful what hardware you buy. Your hardware choices may restrict you to a few compatible versions of your operating system, preventing you from upgrading until you sell it. The interfaces I am using now are compatible with MacOS 12 but will probably not work for much longer.

Focusrite Liquid Saffire 56. You’re not supposed to be able to link them together – but you can.

I already owned a Focusrite Liquid Saffire 56 with a pair of additional 8-channel optical inputs. It was a great inexpensive system for recording live bands. I was able to find a second 56 for ~$600. Focusrite FIrewire interfaces have a special mode called ‘Twin Linking’ where the driver software ties two interfaces together as one unit. The documentation says that you can NOT link two 56s together – but you can. This configuration is not allowed by Focusrite because, with every input and output channel running, it is possible to exceed the maximum bandwidth of the Firewire 400 connection. Fair enough – but they don’t stop you from just doing it anyway. My only concern is to push 26 channels of audio out of the computer to run my dome and they are able to handle it brilliantly for a fraction of the price of a 32 channel interface.

Since writing this entry I have changed the hardware setup several times. I discovered a cheaper hardware combination that pairs two old Alesis ADAT recorders with the Liquid Saffire 56. ADAT units are currently $100 or less each. The drawback of using the first generation black case ADATs is a fixed -10dB output from the converters, which has to be matched to the +4dB outputs of the Saffire. I modified the dome software to store presets for individual channel gain and the problem was fixed. Later ADAT units (with silver cases) can output at +4dB.

Alesis ADAT recorders in the dome controller box. These are a very cheap option for adding channels to an audio interface.

In the interests of maintaining compatibility with modern operating systems into the future I am transitioning the dome to combination of an RME Fireface 800 and two Behringer ADA8200 ADAT converters. RME have an excellent record of keeping every one of their interface drivers up to date. Their very first Firewire interface is still supported. The ungainly chain of dongles required to attach it to my M1 Mac Mini (Thunderbolt 3 to Thunderbolt 2 to Firewire 800) is rock solid in daily use. Eventually I will probably abandon Firewire and move to the RME Digiface USB. This tiny interface is just a box of ADAT lightpipe ports, allowing me to connect four ADA8200 units for 32 output channels.

DIY 26 Speaker Ambisonic Dome – Part 1, The Dome Structure

DIY 26 Speaker Ambisonic Dome – Part 3, The Software